In this post I will describe how to add a pre-trained YOLOv3 model to opencv application in python. We will create a script that will enable us to see in a picture some identified objects that the model is able to detect.
What is YOLO and opencv?
YOLO is an efficient machine learning algorithm to find objects in a picture, in contrast to other algorithms it looks on each secion of the picture only once, thus it's named You Only Look Once and if you want to read more you can do so here.
Opencv is a library for computer vision that's written in C++ and has binding to other languages including python
If you didn't install opencv and numpy keep reading, if you did you can jump to the next secion.
installations
to install opencv and numpy in your virtualenv
$ pip install opencv-python
$ pip install numpy
Now, that we installed the required packages we can start coding!
imports
Now, we need to import the packages we will use in the code
import cv2
import argparse
import numpy as np
we import all the packages, we use import numpy as np since that is the convention for numpy.
arguments for the script
Now, let's create the arguments for the script so the user can give it the image and the data for the pre-trained model
parser = argparse.ArgumentParser()
parser.add_argument('-i', '--image', required=True, help='path to input image')
parser.add_argument('-c', '--config', required=True, help='path to yolo config file')
parser.add_argument('-w', '--weights', required=True, help='path to yolo pre-trained weights')
parser.add_argument('-C', '--classes', required=True, help='path to text file containing class names')
args = parser.parse_args()
The first line creates an parser that will add the arguments with add_argument, each command adds an argument as the name suggests with 2 ways of writing it in the command line a short version and a long version.
Since we added the dash (-) the parser would allow it to be optional, but we want those arguments to be required, so we add the "required=True".
The last line is parsing the arguments the user gives and puts them in the variable args, we will get the inputs from there later on.
In our main function we will get the arguments info with
args = get_arguments()
First we will get the width and hight of the image we got as input
height = image.shape[0]
width = image.shape[1]
The member variable shape is a tuple that gives us the dimensions of the matrix of the image. The first value is the height and the second is width.
Now, let's get the classes that the model is trained for
with open(args.classes, 'r') as f:
    classes = [line.strip() for line in f.readlines()]
We want each class to be represented with a different color, so we get random colors for the classes
colors = np.random.uniform(0, 255, size=(len(classes), 3))
Reading the neural net for the YOLO model
net = cv2.dnn.readNet(args.weights, args.config)
Now, that we have the model with the weights and structure we can create a blob that we can use as the input for the model
blob = cv2.dnn.blobFromImage(image, 0.00392, (416, 416), (0, 0, 0), True, crop=False)
net.setInput(blob)
We give the image as input, the number 0.00392 is the scale factor for the color number to be in the range 0-1, since we use an image with range of 0-255 we use 0.00392 which is about 1 / 255.
In YOLOv3 there is more than one output layer, so we create a function to get all the output layers
def get_output_layers(net):
	layer_names = net.getLayerNames()
	output_layers = [layer_names[i - 1] for i in net.getUnconnectedOutLayers()]
	return output_layers
We want to get the names so we can use them to run the model and get to the output layers, we start by getting all the layer names, then we get the names of the output layers and we return them.
Now back to the main function, we get the names and run the input data on the model up to the last layers we got from the previous function
output_layers = get_output_layers(net)
outs = net.forward(output_layers)
Here we define a few variables that we will use later on
class_ids = []
confidences = []
boxes = []
conf_threshold = 0.5
nms_threshold = 0.4
The variable class_ids will hold all the class id's we will detect, confidences will be used to create the boxes around the objects detected, so there will be only one box around each object. We will store all the boxes in boxes and the last 2 variables are for thresholds as the name suggests
Now let's start running on all the outputs and start detecting the objects, it's a bit long
for out in outs:
    for detection in out:
        scores = detection[5:]
        class_id = np.argmax(scores)
        confidence = scores[class_id]
        if confidence > 0.5:
            center_x = int(detection[0] * width)
            center_y = int(detection[1] * height)
            w = int(detection[2] * width)
            h = int(detection[3] * height)
            x = center_x - w / 2
            y = center_y - h / 2
            class_ids.append(class_id)
            confidences.append(float(confidence))
            boxes.append([x, y, w, h])
We start by running on all the outputs and for each output run on it's detection, that's the first 2 lines. The next line after that is getting all the scores of that detection
scores = detection[5:]
Since this is a neural network model we get scores for each possible class the model is trained for, so we need to find the best match, which is done in the next line, the position is the class id which we get in the next line
class_id = np.argmax(scores)
confidence = scores[class_id]
In the second line above we get the score for that object, meaning how confident the model is that the object is of this class.
Next, we check if the model is confident with more than 50% that it's right about the class and if so we get it's coordinates on the image and calculate the size
if confidence > 0.5:
We start by calculating the center of the object in the x direction and y direction, we need to multiply with the width and height of the image since the detection is given between 0 and 1. Thus, we need to scale it back to the image dimensions.
center_x = int(detection[0] * width)
center_y = int(detection[1] * height)
Then we calculate the object width and height
w = int(detection[2] * width)
h = int(detection[3] * height)
Once we have the center of the object and it's width and height we can calculate it's starting position in the x and y direction
x = center_x - w / 2
y = center_y - h / 2
For each object we find we add it's class id to class_ids, it's confidence to the confidence list and it's coordinates to boxes
class_ids.append(class_id)
confidences.append(confidence)
boxes.append([x, y, w, h])
We are alomost ready to show our objects, now we just need to show only one box per object. Since YOLO can find the same object multiple times we want to show just the best candidate box. So we can use NMSBoxes which will calculate which is the best box to show as the bounding box for this object. That is why we needed the conf_threshold and nms_threshold variables, it's used to filter the least good boxes without need to calculate which is better and it returns the indices of the right boxes to show
indices = cv2.dnn.NMSBoxes(boxes, confidences, conf_threshold, nms_threshold)
Let's make a function to draw a box for each object so it will be a bit cleaner
def draw_bounding_box(img, class_id, classes, colors, x, y, x_plus_w, y_plus_h):
	label = str(classes[class_id])
	color = colors[class_id]
	cv2.rectangle(img, (x, y), (x_plus_w, y_plus_h), color, 2)
	cv2.putText(img, label, (x - 10, y - 10), cv2.FONT_HERSHEY_SIMPLEX, 0.5, color, 2)
We start by getting the label for this object and the color for it, then we draw a rectangle around the object, we give the function the image, the x and y coordinates, the x + width and y + height coordinates, the color of the bounding box and the width of the line. In the last line we write the label of the object, at a position x - 10, y - 10 with a font we chose, scale of the font relative to it's base size, color and the thickness of the line of the font.
Now all that remains to do is to show the boxes in the picture, so we run in a loop and make it a bit easier to know what we send to the drawing function we just wrote
for i in indices:
    box = boxes[i]
    x = box[0]
    y = box[1]
    w = box[2]
    h = box[3]

    draw_bounding_box(image, class_ids[i], classes, colors, round(x), round(y), round(x + w), round(y + h))
we put each of the data points from the box in a variable, we round the numbers to the closest whole number and send it to the function to draw it on our image.
Now, at last, we can see the results, we can show the image with the next line
cv2.imshow("object detection", image)
cv2.waitKey()
This function get the title of the image and the image itself to be shown. We use the waitKey function so the image will not stop showing right after it's displayed, it will wait until we press a key (any key) to be closed.
If you want to save your result as an image including the boxes and labels you can use the next line for it
cv2.imwrite("object-detection.jpg", image)
The first parameter is the name of the file to be created, and the second is the image to be saved.
At the end of the function we should always release all the resources, and we do this with the next line
cv2.destroyAllWindows()
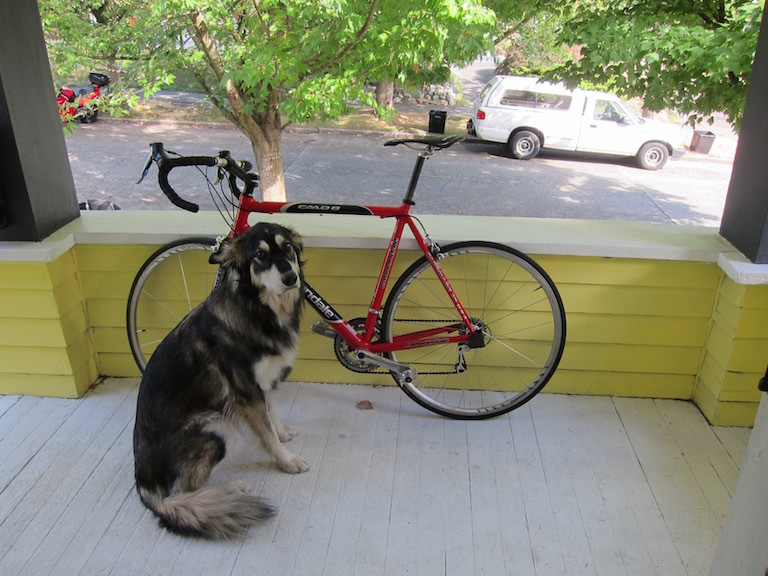
Let's try it out, here is an image I used to check if it works correctly
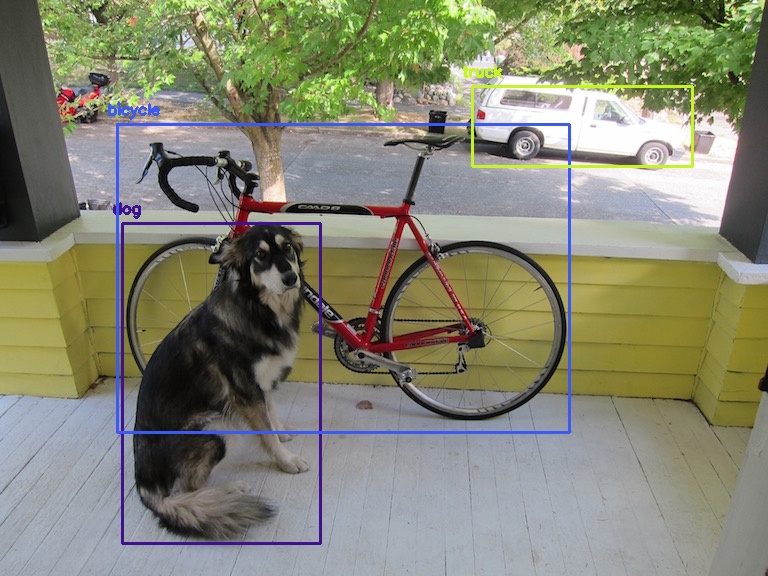
And here is the image with the boxes of object detection
I would love to hear your comments, you can join me at telegram in the link https://t.me/moshe742_blog to comment and talk about this post
